Paint Kitchen Cabinets DIY: 3 Weekends, $280
Painting kitchen cabinets saved thousands on our kitchen remodel. Three weekends, one degreasing mistake that cost a redo, and the real cost.
TL;DR
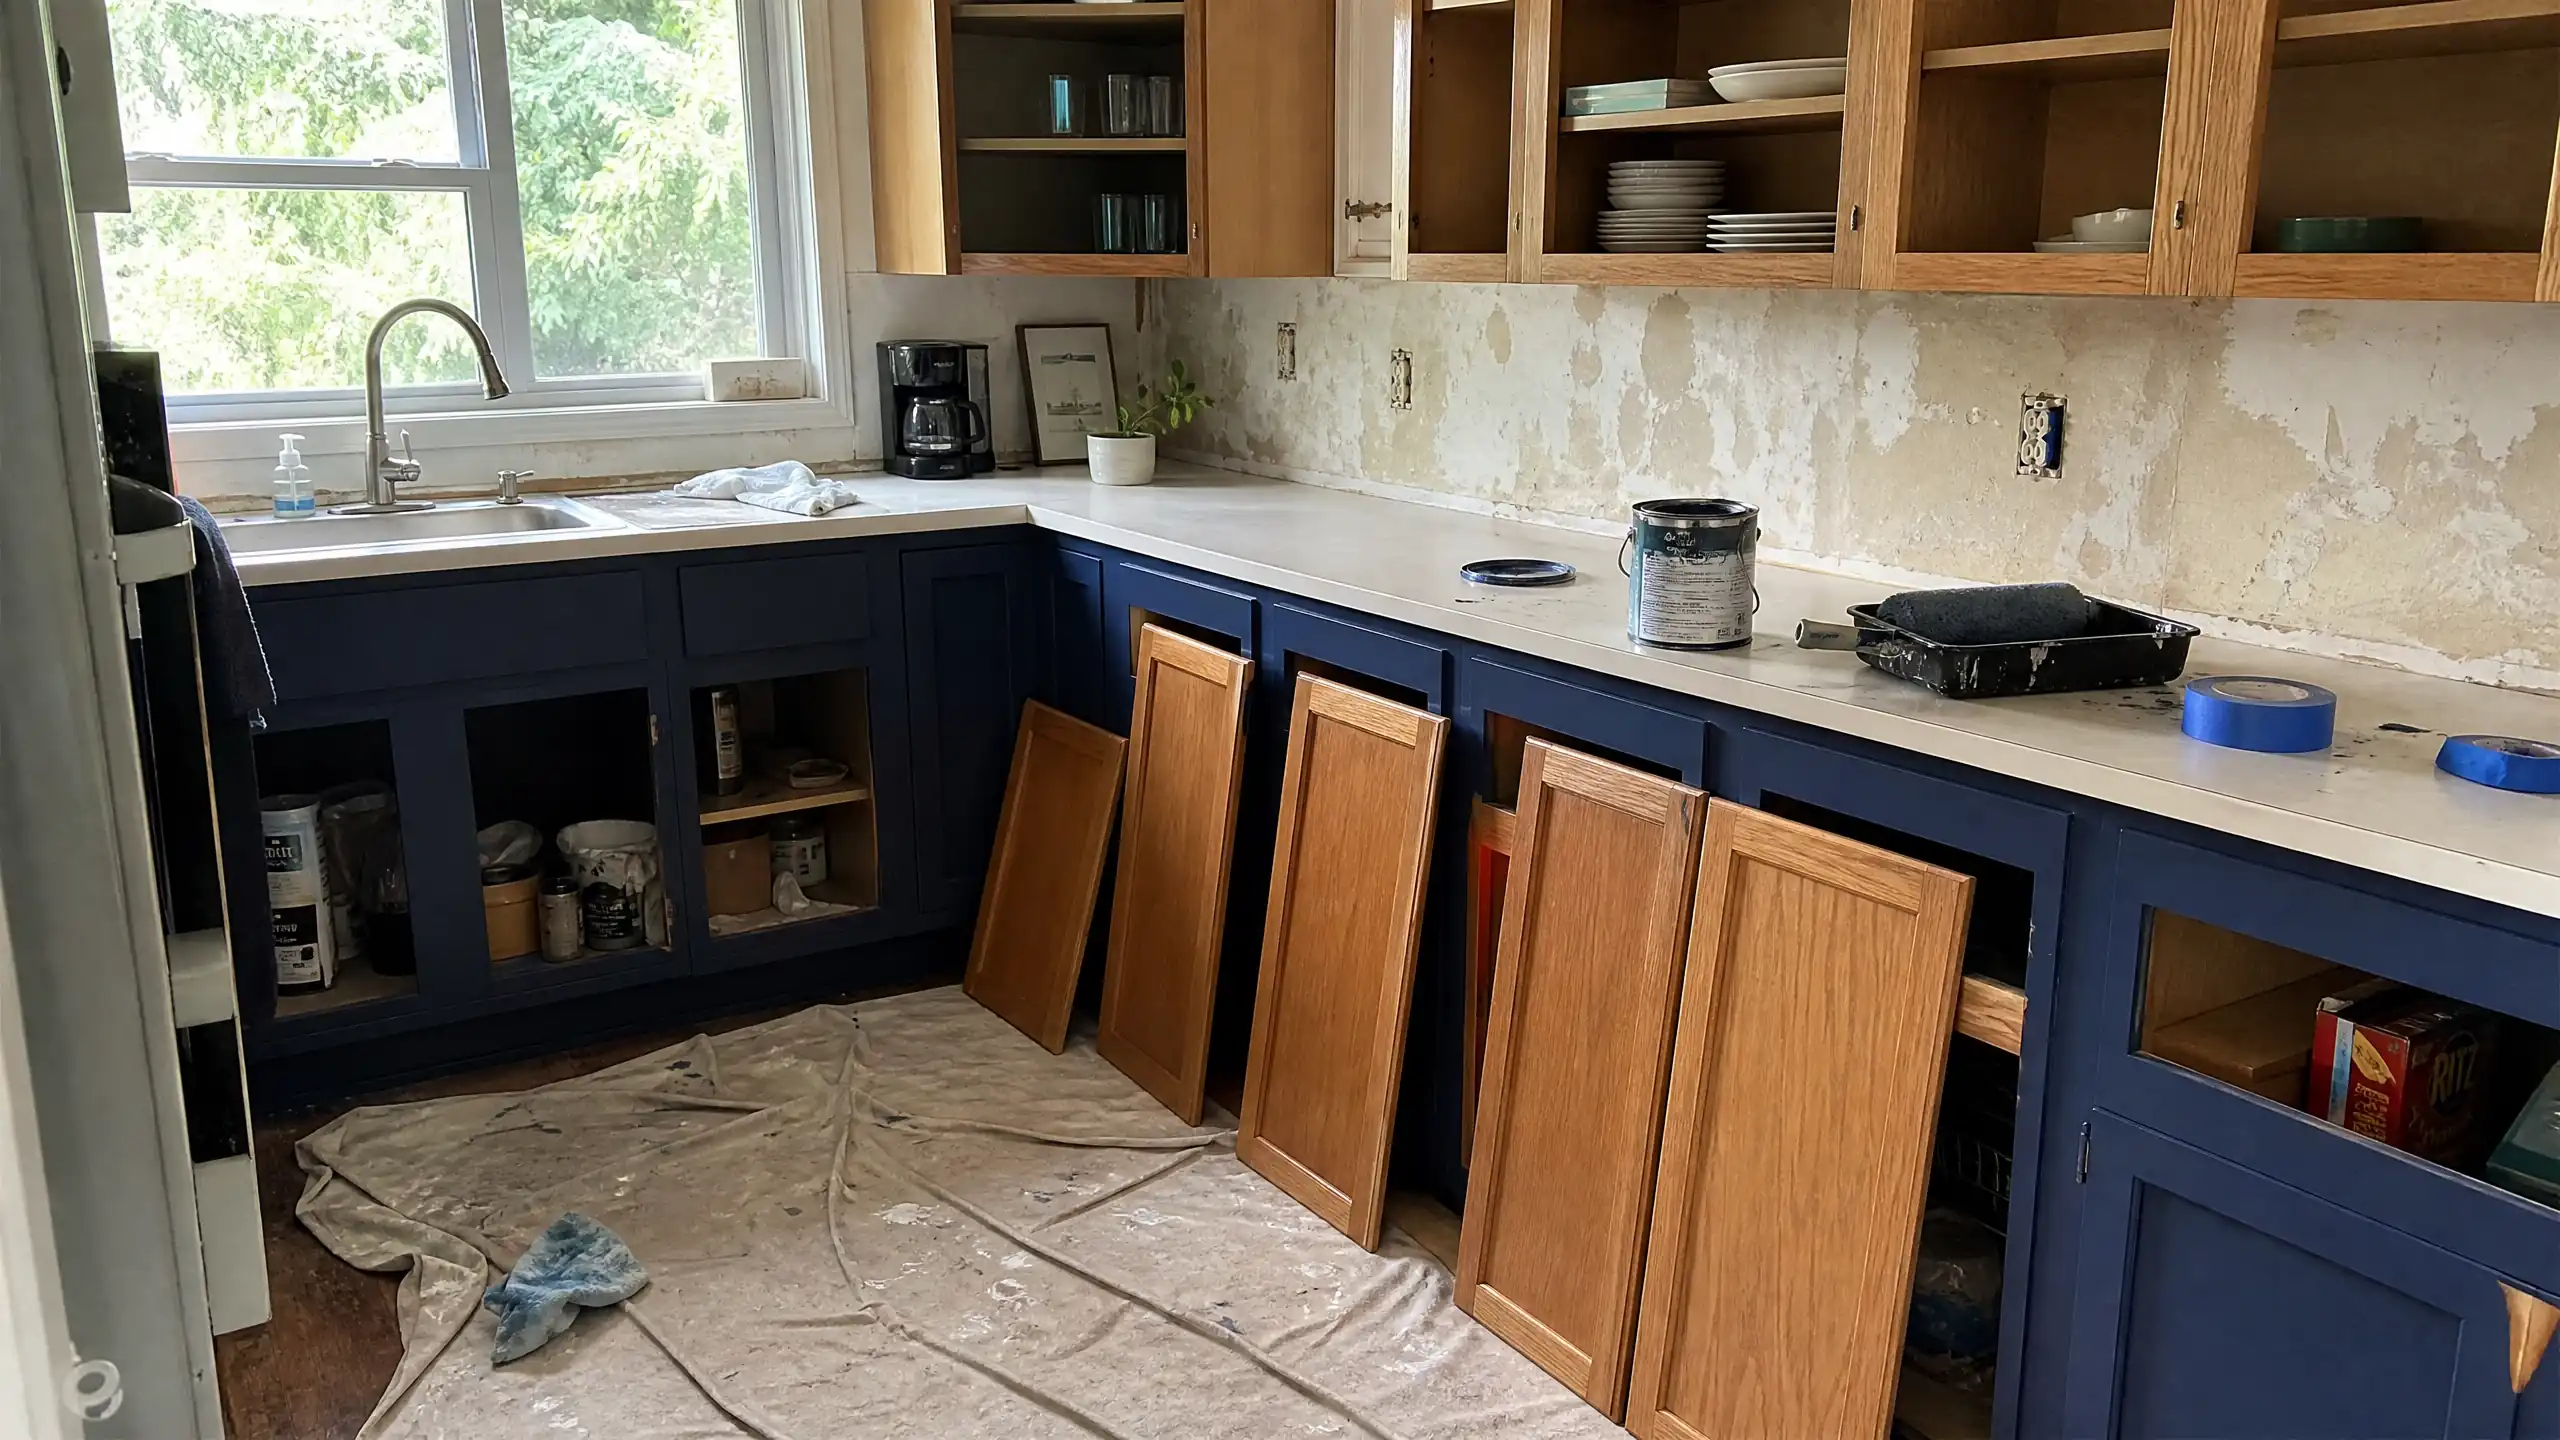
Decided to repaint my kitchen cabinets over the weekend. Spoiler alert: it took 3 for about 280$ in materials. That is significantly less than the 8000$ quote I got for refacing everything, and the 15000$ for new cabinets. The biggest challenge, degreasing, took the longest. And the rushed second coat bubbled, so I had to strip and redo them. A sprayer rental was worth every dollar. Total time was three weekends, not the one-weekend promises I kept reading online.
Why We Painted Instead of Replaced
The three quotes read cleared up my head. Full replacement, new cabinets, installation, and disposal of the old ones started at $15,000 for our 22-linear-foot kitchen. Refacing, that’s where they keep the boxes and replace the doors and drawer fronts, came in at a baffling $8,000. Both numbers included materials but not the headache of living without a kitchen for two weeks, and for my introvert friends out there, having a stranger in their home.
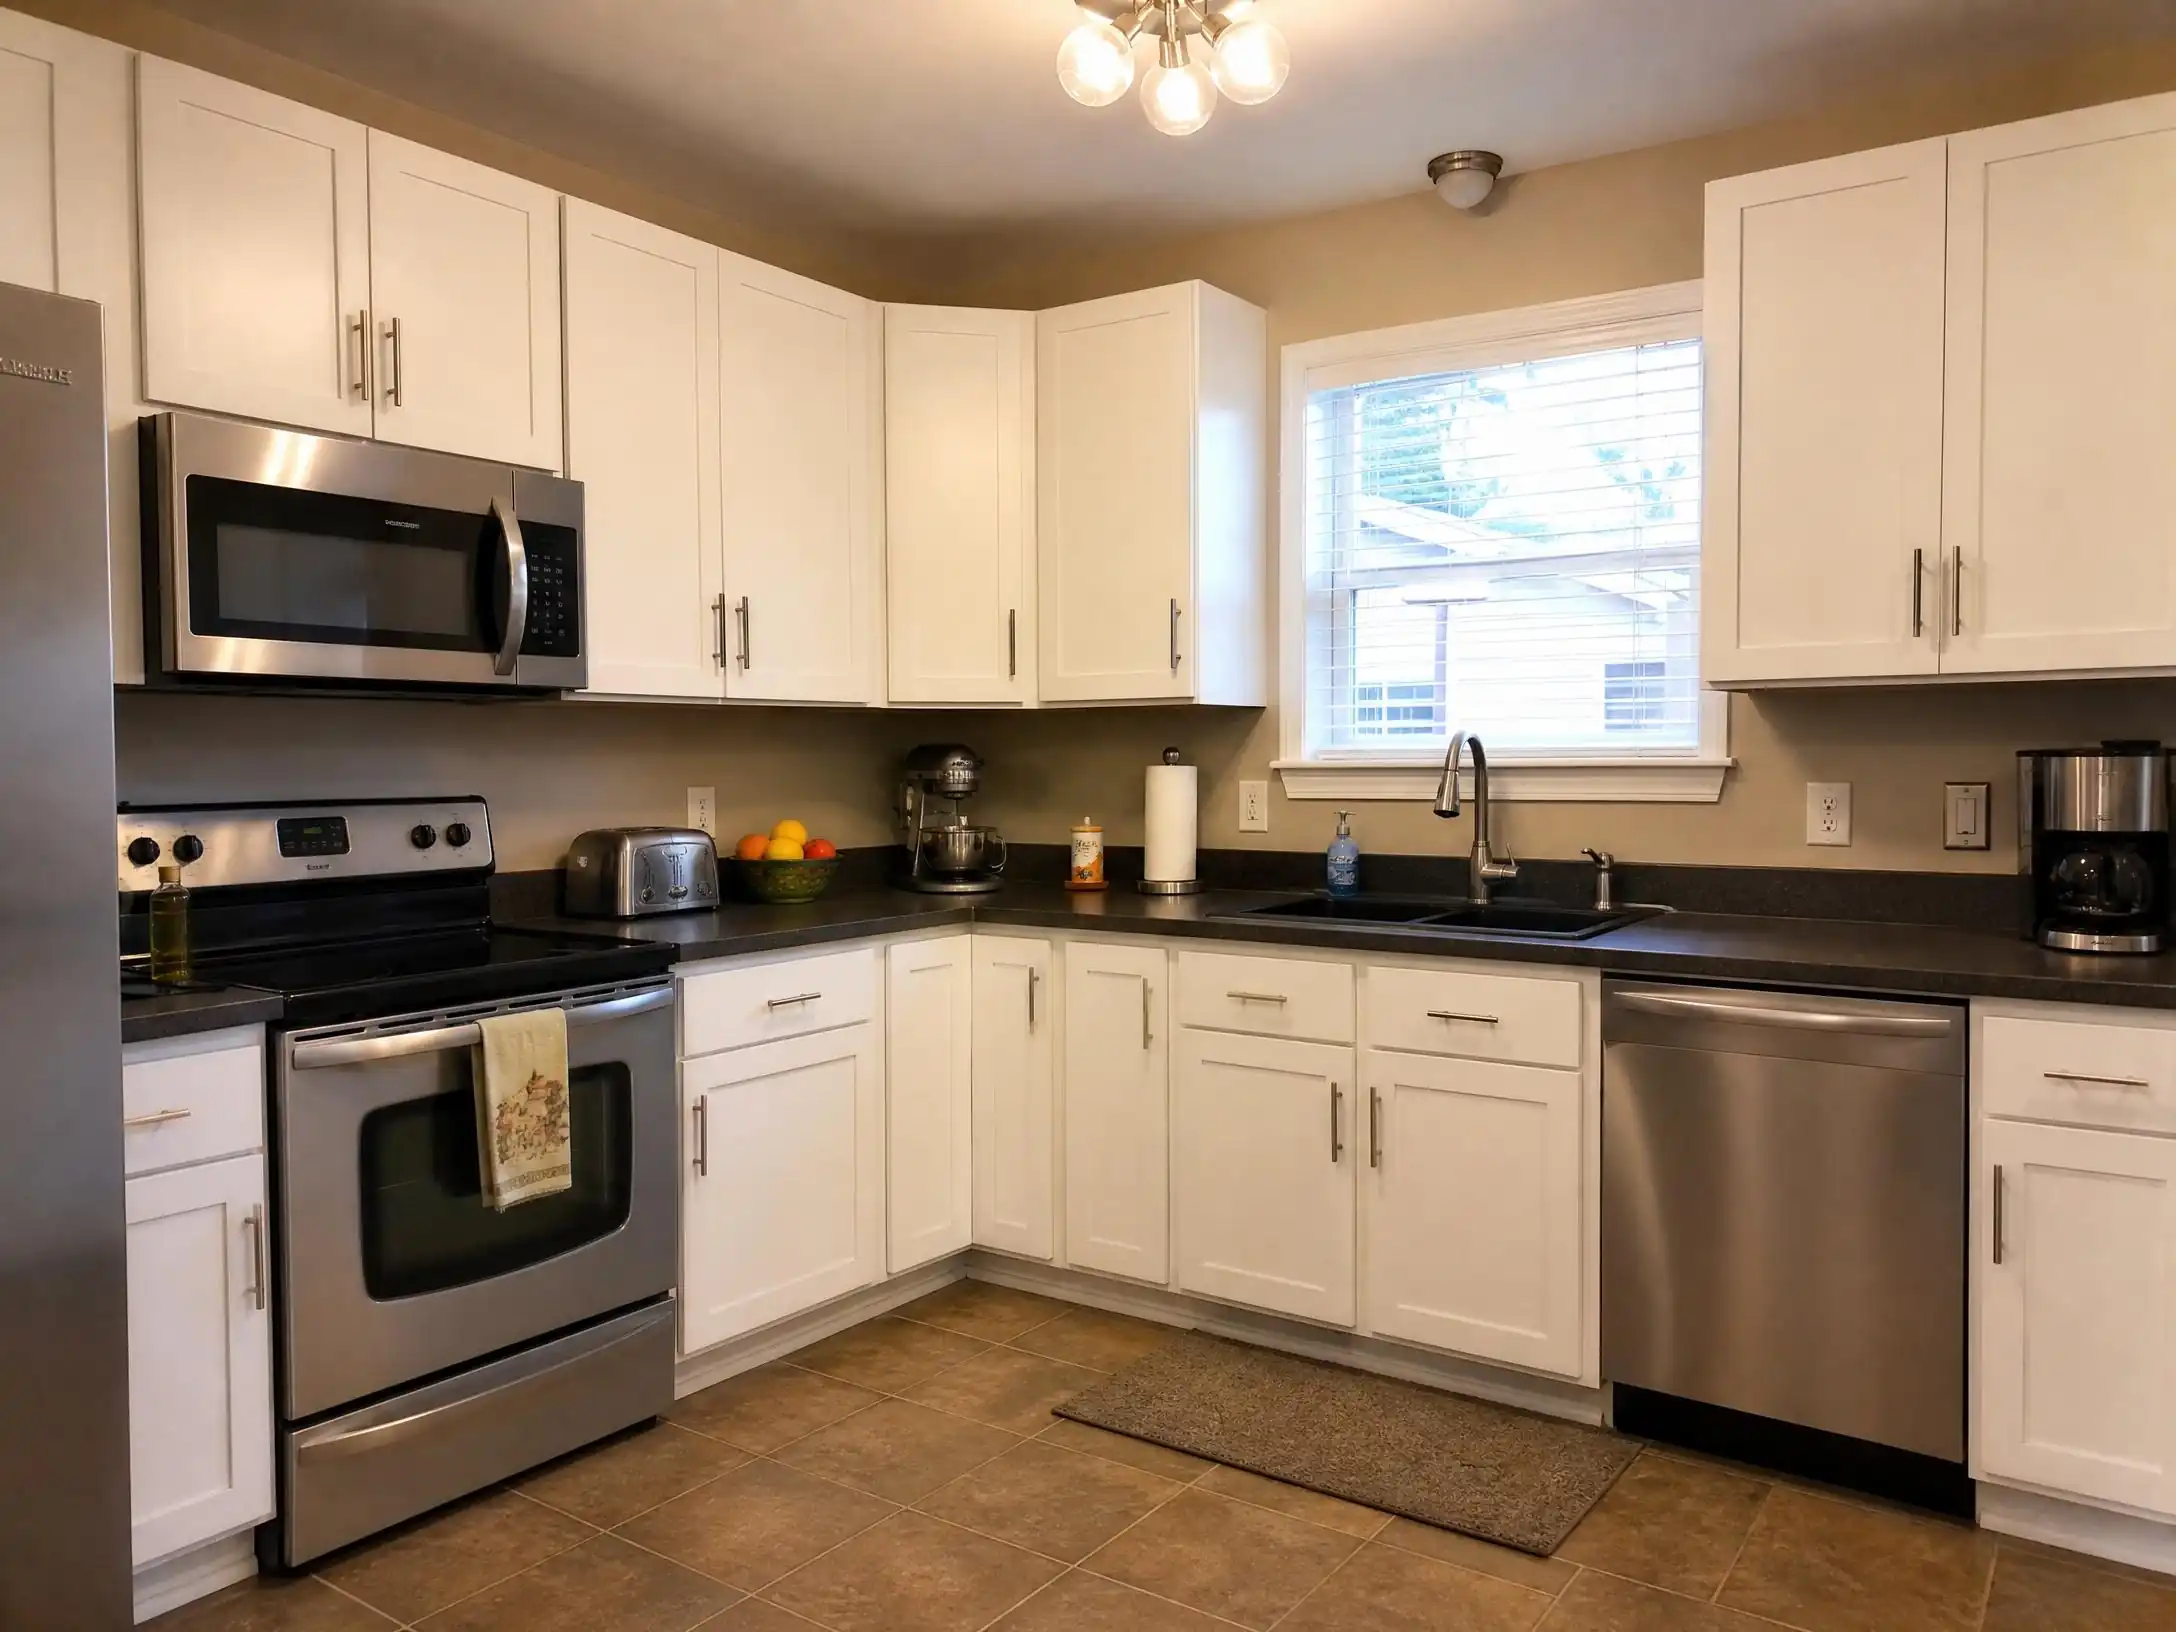
The DIY route cost me $280 in materials and three weekends of my time. The kitchen looked exactly how we wanted: a warm off-white with brushed nickel pulls, and the only thing I gave up was the soft-close hardware that new cabinets would have included. I added dampers later for about $40.
Our cabinets were solid wood, not MDF or particleboard. That mattered. If the boxes are particleboard with a vinyl wrap, painting is trickier, and making it stick is even harder. Solid wood or plywood boxes with a factory finish take repainting more sportingly and are less fussy.
Prepping the Cabinets (don’t skip this and don’t underestimate it also)
Prep is arguably the most important part of the entire job. I am not exaggerating. If the finished paint looks streaky, reflects wrong, or peels in six months, prep is why. I spent more time on prep than on priming and painting combined, and I’m glad I did.
Removing Doors, Hardware, and Labeling Everything
Thirty-two doors and fourteen drawer fronts. That is what came out of our kitchen. I numbered each one with painter’s tape on the back upper-left, upper-right, middle-left, and so on and stored the hinges in labeled sandwich bags. This may sound like I have OCD or something until you try to match thirty-two unlabeled doors back to their frames and discover none of the hinges line up the same way twice.
The hardware came off next. I kept all the original screws in their own bag as backups, even though I planned to replace the pulls with new ones. Pro tip: Take a photo of the inside of one door before removing the handle so you know which hole spacing you are buying for.
Tip: Label every door on the back with painter’s tape before you remove the hinges. The holes never align the same way on a second set. I numbered mine U1 through U16 (upper) and L1 through L16 (lower), plus D1 through D14 for the drawers. That numbering saved me an entire afternoon during reassembly.
Degreasing Before Sanding, the Mistake That Cost Me a Redo
I skipped the deep degrease on the first six doors I prepped big mistake. I wiped them with a damp cloth, sanded, and moved on. Two coats of primer and one coat of paint later, those six doors had fisheyes and little craters where the paint refused to stick to a residue I could not see. Imagine my frustration sitting alone with newly painted 6 doors that don’t look right. I have to admit I may have used artificial intelligence to diagnose my paint job, as I’m no professional painter. The grease from six years of cooking above the stove had baked into a film that water alone would not touch.
I had to strip those six doors down to bare wood with chemical stripper, sand again, and start over. That cost me half of my second weekend. And let me tell you it was not fun.
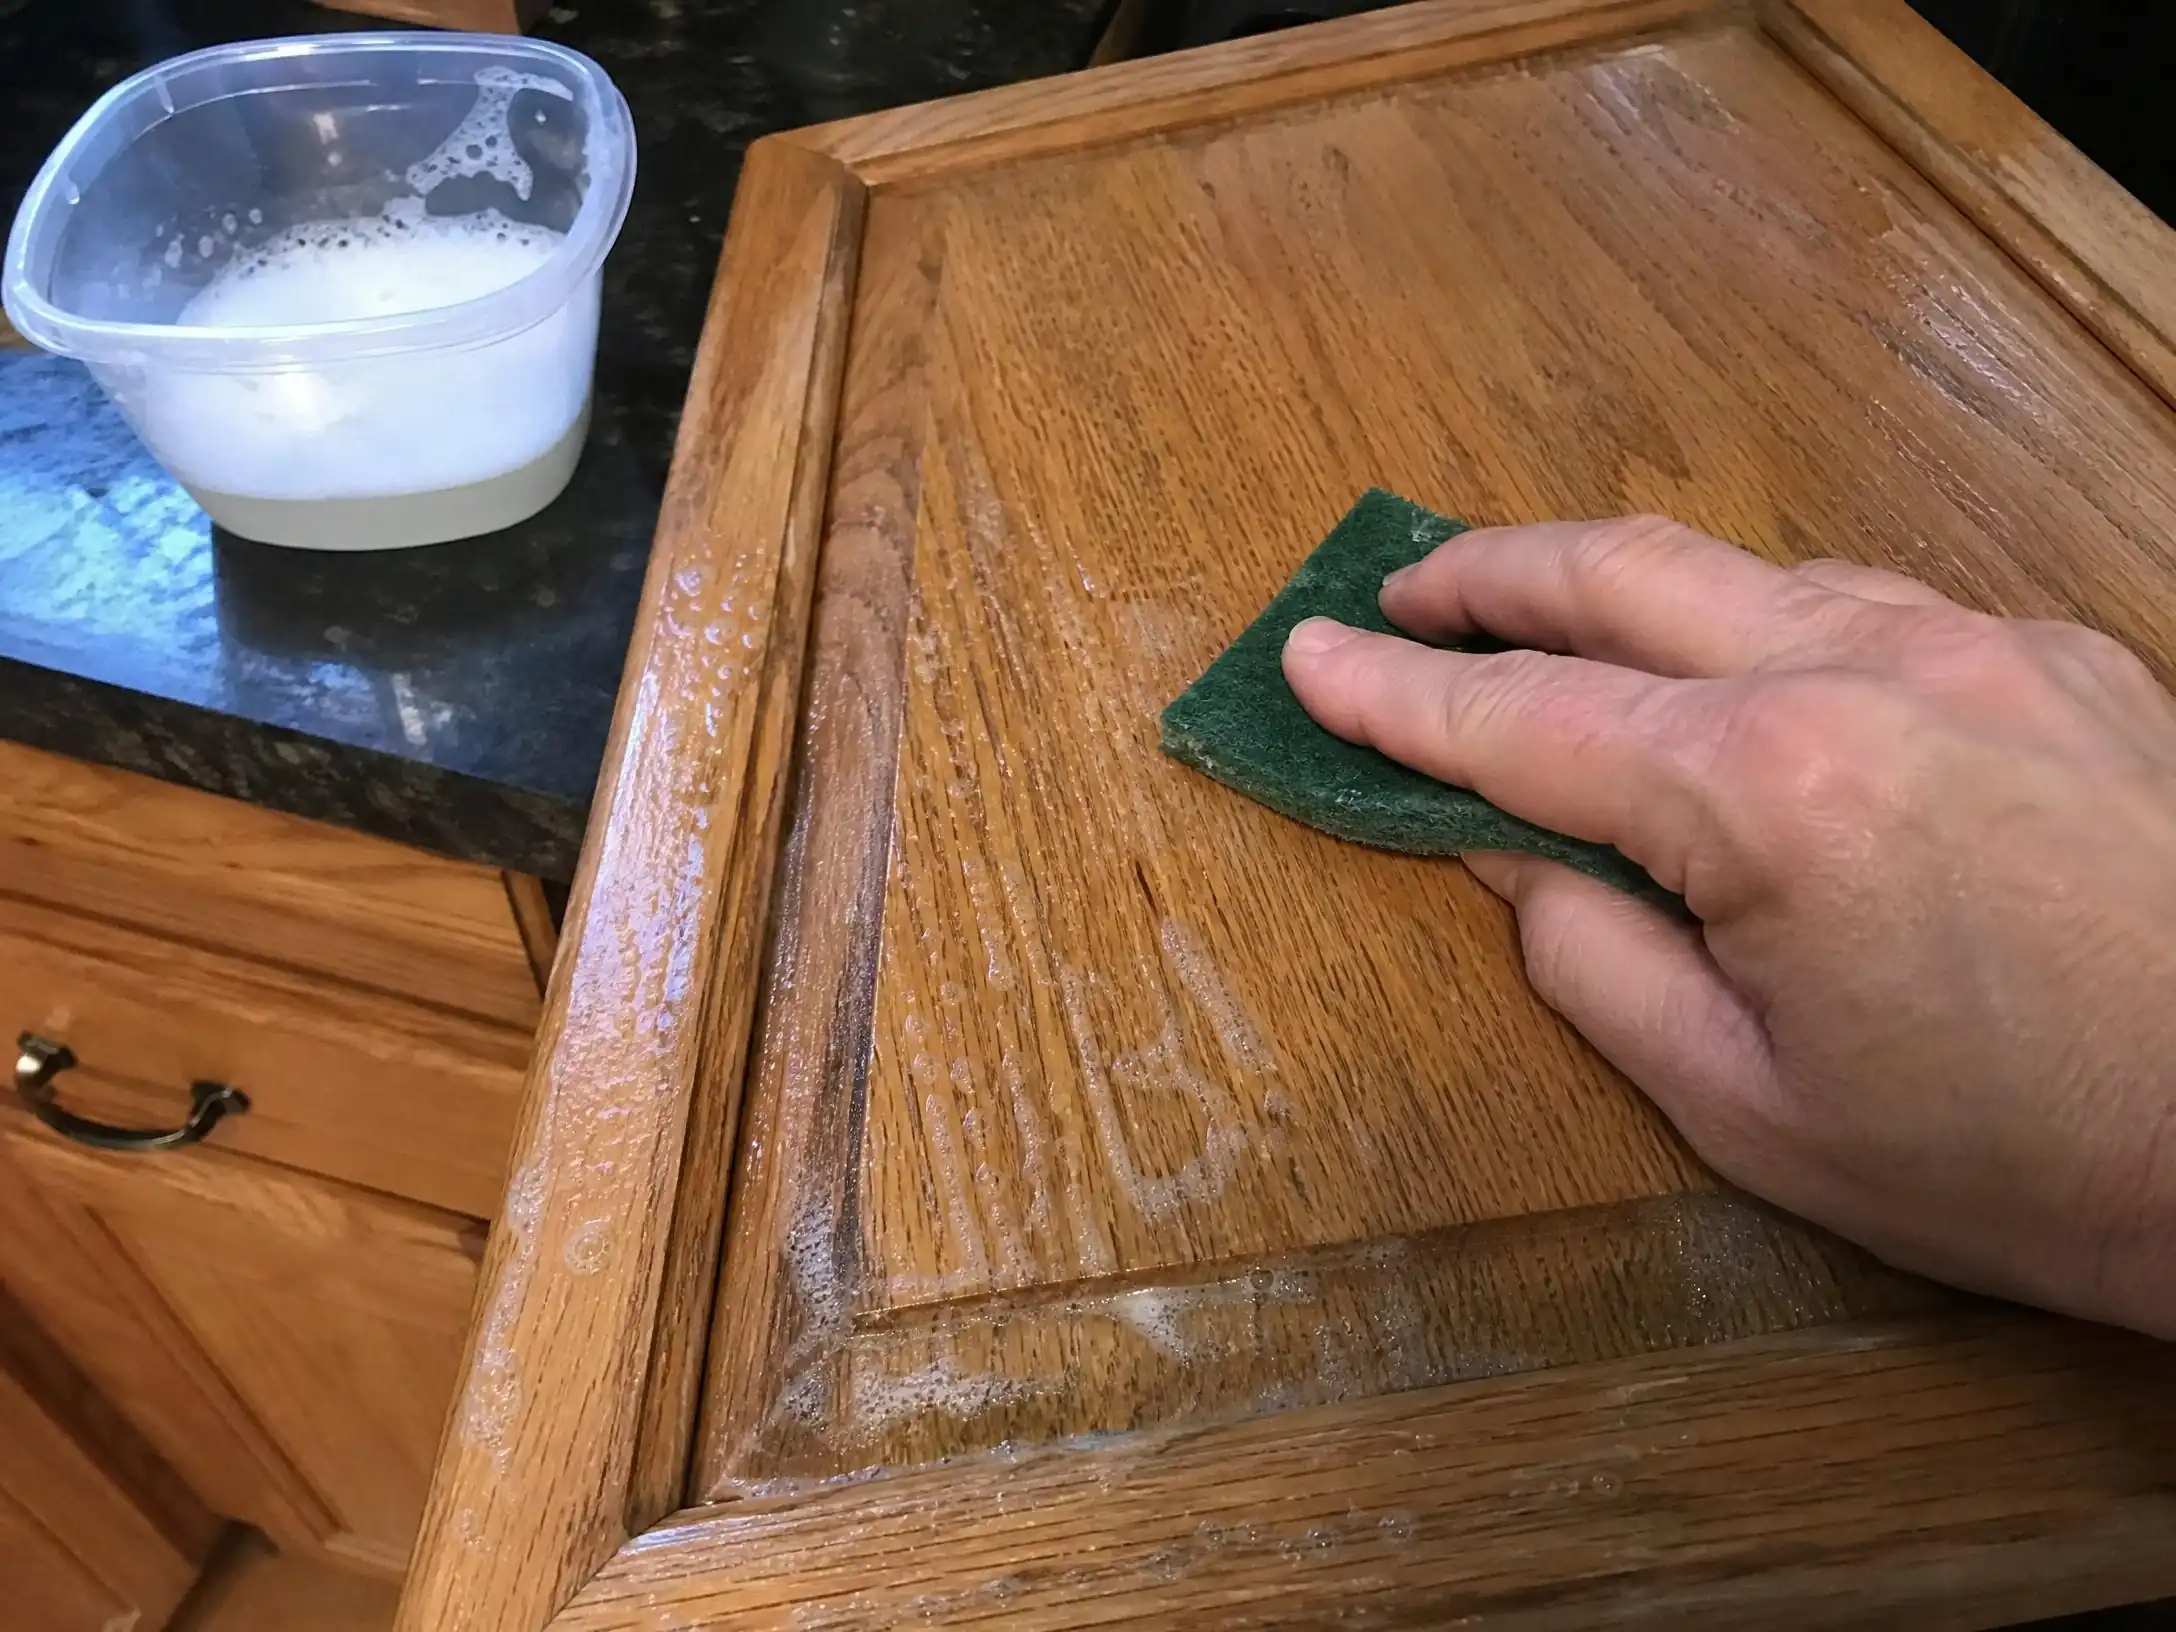
The fix: TSP substitute (trisodium phosphate replacement) mixed with warm water, scrubbed with a green scouring pad, then rinsed clean. I went through three buckets of dirty water before the rinse ran clear. Every cabinet face, every door, every drawer front, including the ones above the fridge that had their own layer of airborne grease I had not considered.
Do not skip the degreasing. A damp cloth will not cut kitchen grease. Use TSP substitute and a scouring pad. If the rinse water comes off colored, scrub again. The paint will only stick as well as the surface below it, and grease is invisible until your primer fisheyes.
Sanding and the Dust Problem Nobody Mentions
After degreasing and drying overnight, I sanded every surface with 220-grit paper on a sanding block. The factory finish on oak cabinets is glossy enough that paint needs a mechanical grip. I did not sand aggressively; just enough to knock the sheen off and rough up the surface. If you are also working with a glossy surface, please make it rough, or you’ll be sorry you undertook this project.
The dust was the problem nobody warned me about. Sanding thirty-two doors and fourteen drawer fronts in a garage produces a fine powder that gets everywhere. I am an individual with severe allergies to dust, so a respirator was used. Also, the cleanup dust was present in every nook and cranny of the garage and the house, so please keep that in mind.
Note to self, and you all also make use of a plastic tent that you can set up in your garage, etc sand everything there. Make sure no dust is getting put. This will take the cleanup from days to a few minutes.
Priming: Why I Didn’t Skip It Even Though I Wanted To
Every guide says prime. I almost did not. My cabinets were a medium oak with a visible grain pattern. The paint was a solid off-white. I told myself two coats of a quality paint would cover it.
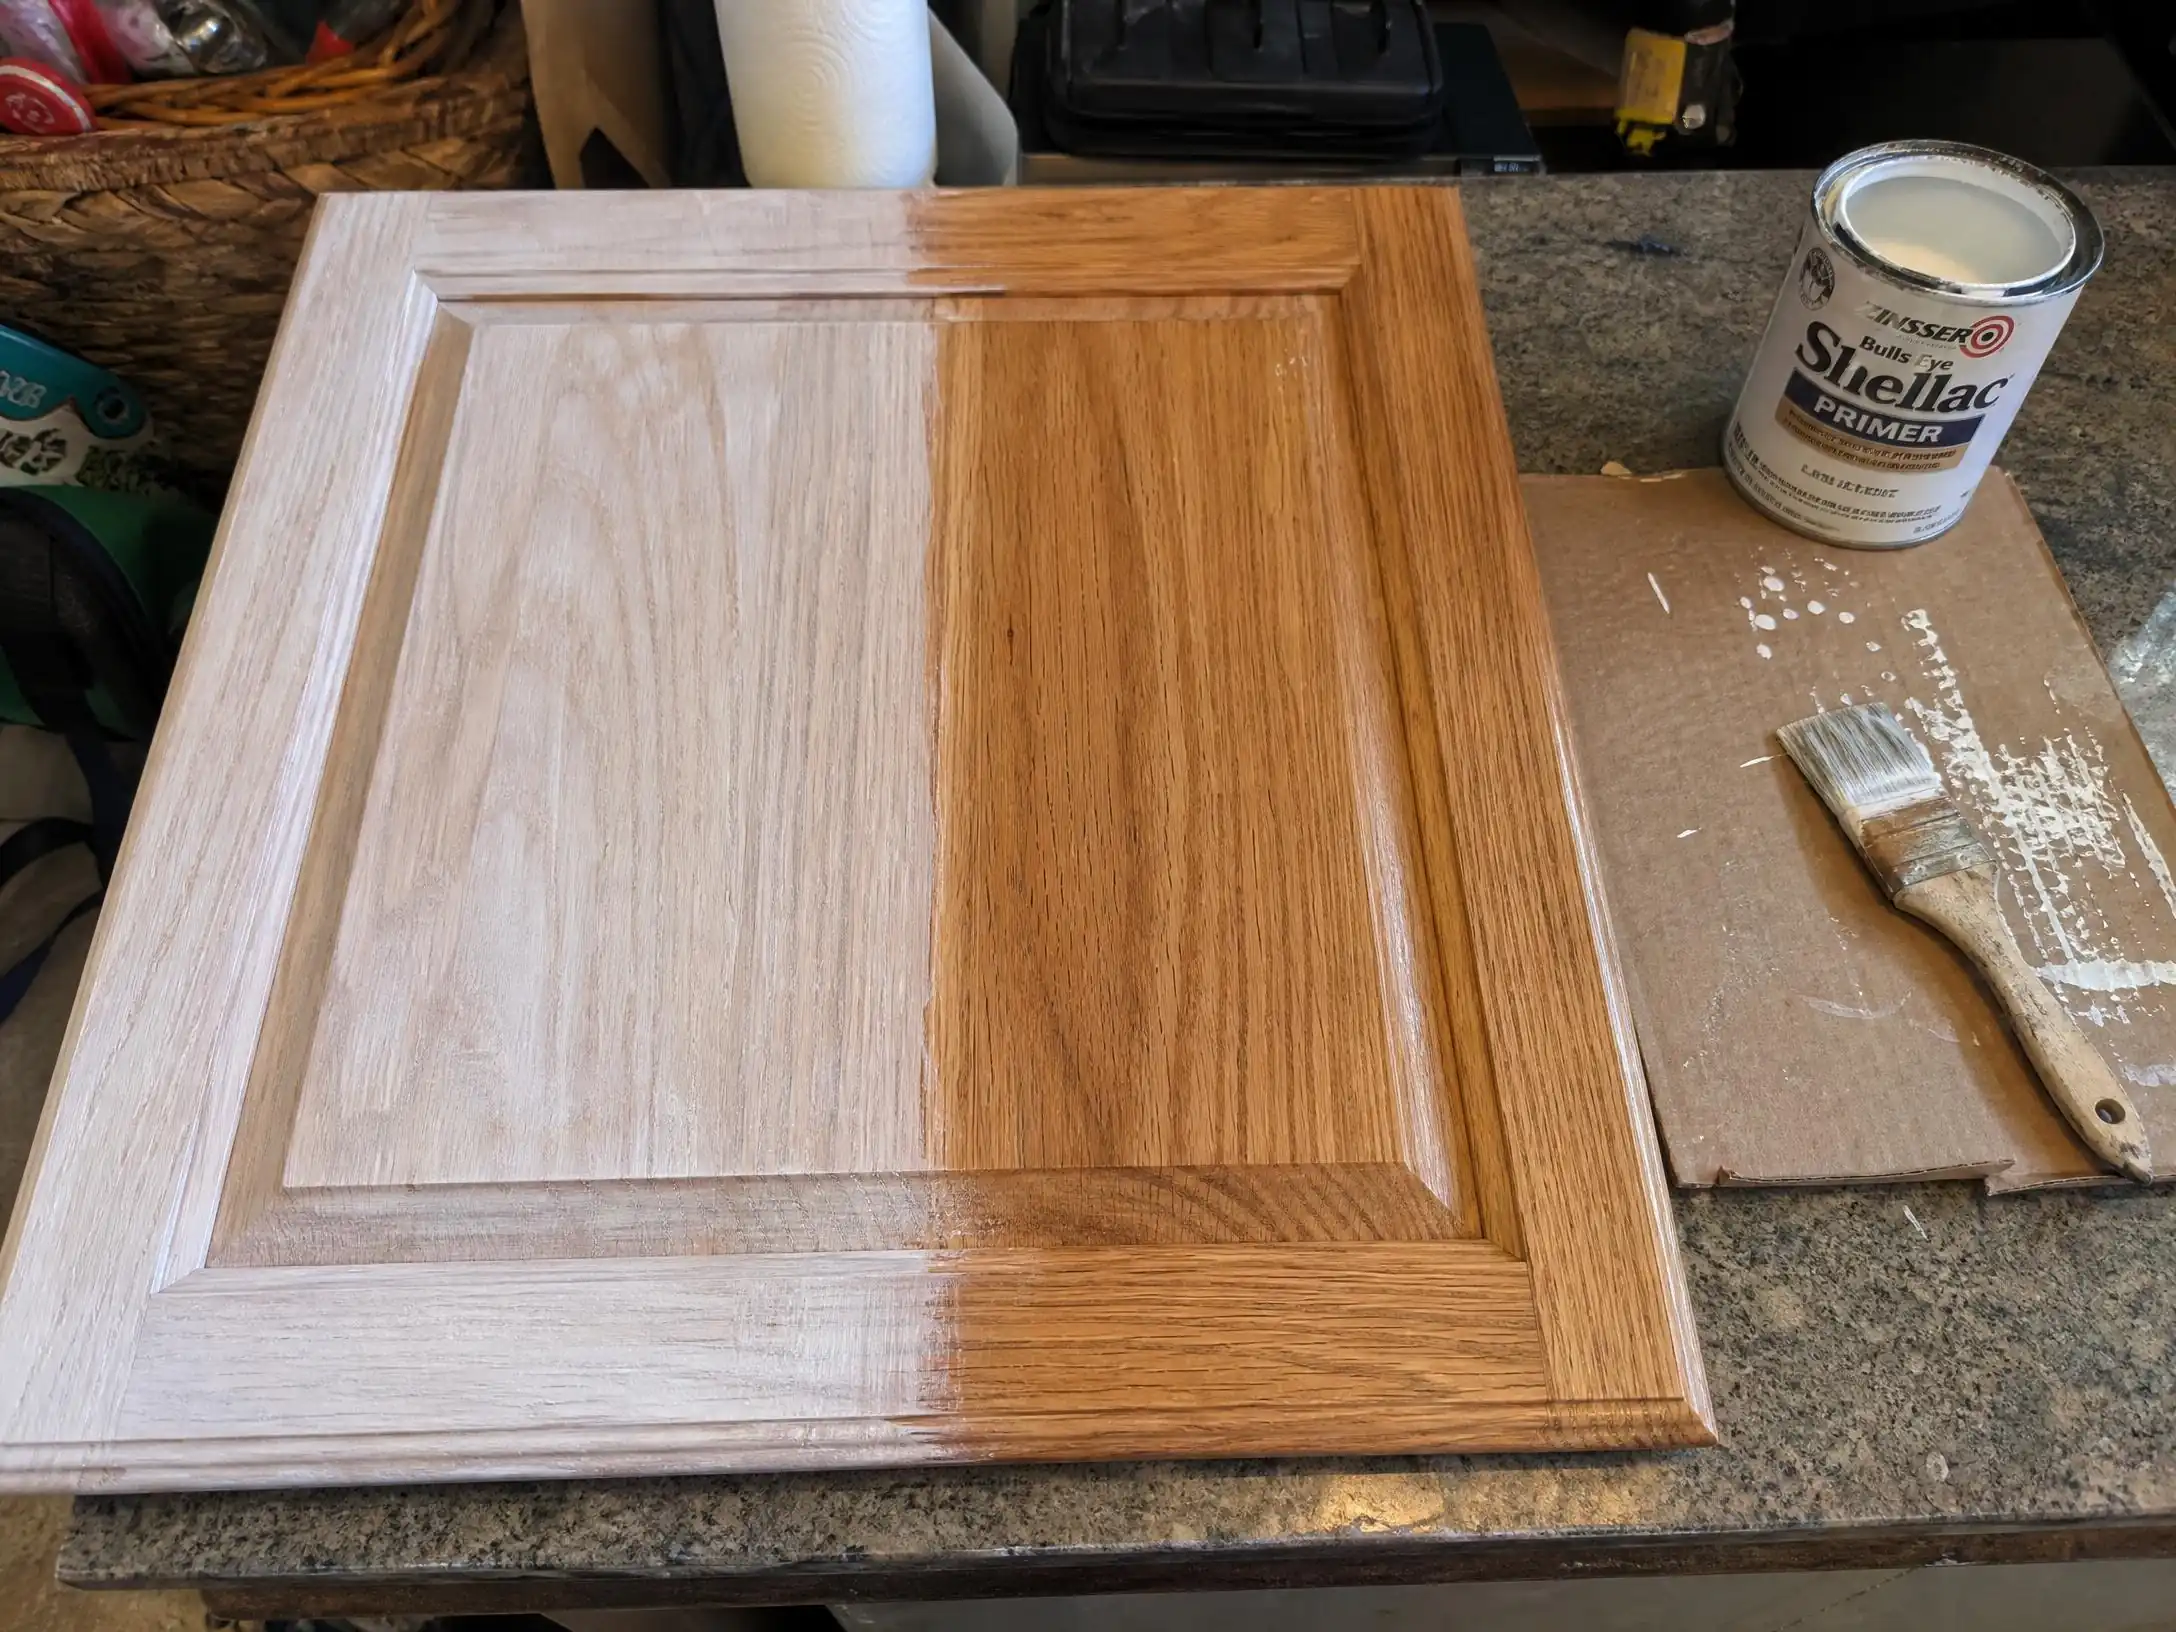
I was wrong. The grain pattern showed through the first paint coat on the unprimed test door. Oak has an open grain that bleeds tannins and telegraphs through paint if you do not block it first. I used Zinsser BIN shellac-based primer the stuff with shellac, not the water-based version and one coat sealed the grain completely. The downside: it smells strong and requires denatured alcohol for cleanup. The upside: it dries in 45 minutes, and nothing else blocks tannins as well.
I primed every cabinet door, drawer, etc with one even coat, front and back. Then I let them set and dry for 24 hours and then only sanded lightly with 320-grit and moved to paint.
If your cabinets have visible wood grain, especially oak, use a shellac-based primer like Zinsser BIN. Water-based primers do not block the grain as effectively on open-pored woods. The 45-minute dry time means you can prime sixteen doors in an afternoon and flip them overnight.
Zinsser BIN Shellac-Based Primer (1 Quart)
AmazonCheck Price →
Affiliate Link
KILZ Adhesion High-Bonding Primer (1 Gallon)
AmazonCheck Price →
Affiliate Link
The Actual Painting
Painting was the fastest part of the project, about four hours per coat across all surfaces, but the most punishing if you got it wrong. I painted in the garage with the door open and a fan running, working in natural light.
Wagner Control Pro 150 High Efficiency Sprayer
AmazonCheck Price →
Affiliate Link
Spray vs. Brush, What I Used and Why
I rented a Wagner HVLP sprayer from the local hardware store for $65 for the weekend. I do not own a compressor, and I did not want to buy a sprayer I would use once.
I cannot recommend the sprayer enough because it produces a finish that looks factory fresh. No brush strokes, no roller texture, even coverage across the flat panels and recessed areas of the shaker-style doors. The learning curve was about fifteen minutes of practice on a piece of cardboard to adjust the pattern width and fluid flow.
But spraying has a catch: you have to mask everything you do not want painted. The cabinet frames inside the kitchen took longer to mask than they did to spray. I used plastic sheeting and blue tape to cover the countertops, the backsplash, the appliances, and the floor. It looked like a crime scene and not a professional one, like if the crime scene was set up for 14 bucks.
A brush would have eliminated the masking time but left visible strokes on the flat door panels. For the cabinet frames, which have a lot of corners and recesses, I actually used a 2-inch angled brush for the interior edges and only sprayed the face frames. That hybrid approach gave me the best of both: factory-looking doors and no overspray on the tile. The best DIYers are the ones who can choose the right tool for the job.
Wooster Brush Q3211-2 Shortcut Angle Sash Paintbrush, 2-Inch, White
AmazonCheck Price →
Affiliate Link
Wooster Brush RR308-4-1/2 Pro Foam, 2-Pack, 4-1/2-Inch
AmazonCheck Price →
Affiliate Link
Drying Time Between Coats (and the coat I rushed)
The paint I used, Sherwin-Williams Emerald Urethane Trim Enamel, recommends four hours between coats at 70 degrees. I followed that for the doors and frames. The second coat went on smooth, self-leveled nicely, and dried to a hard, wipeable finish.
But I got impatient with the drawer fronts on Sunday evening of the third weekend big mistake. I wanted to finish. I applied the second coat after two and a half hours instead of four. The paint was still slightly soft underneath, and the new coat dragged and left bubbles on six of the fourteen drawer fronts. A good test, I feel like, is to press your finger and rub a little; if you feel the paint give way, leave it and wait for another 2-3 hours.
I had to sand those six down, re-prime the bare spots, and repaint them the following weekend. Six drawer fronts cost me an extra Saturday because I could not wait ninety minutes.
The drying time on the can is not a suggestion. If the paint needs four hours between coats, give it four hours. The coat you rush will fail, and the time you saved will be spent sanding it off and starting over.
Reassembly and Hardware
Reassembly took an afternoon. The labeling I did on day one paid off: each door went back exactly where it came from, and the hinge screws threaded in without a fight the best feeling in the world.
I had bought new brushed nickel bar pulls,8-inch center-to-center spacing for the large drawers, and 5-inch for the upper doors, and installed them after the doors were back on. The old screw holes from the original knobs were visible on the inside of the doors, which bothered me for about a day. Nobody sees the inside of an open cabinet door.
The one thing I would change about the hardware: I should have bought a template jig for drilling the new pull holes. I measured and marked each door by hand, and two of them came out slightly crooked. A $15 drilling template would have prevented that. Sometimes it’s worth it to spend money on things you feel like are a waste.
What It Actually Cost vs. Refacing or Replacing
Compare $273 in materials to $8,000 for refacing or $15,000 for full replacement. The material cost is not even in the same conversation.
That is a bit under $280, rounding up for the things I forgot to list. The real cost was labor and patience, about 55 hours across the three weekends. Whether that trade makes sense depends on how much you value your weekends and how badly you want to avoid living with contractor quotes.
| Item | What I paid |
|---|---|
| Sherwin-Williams Emerald Urethane (1 gallon) | $85 |
| Zinsser BIN Shellac Primer (1 quart) | $26 |
| Wagner HVLP sprayer rental | $65 |
| Sandpaper (220- and 320-grit, assorted) | $12 |
| TSP substitute | $8 |
| Green scouring pads, tack cloths, drop cloths | $18 |
| Brushed nickel bar pulls (18 pieces) | $35 |
| Blue tape and plastic sheeting | $14 |
| Respirator masks | $10 |
| Total | $273 |
What I’d Do Differently
If I were starting over, three things would change:
First, I would degrease everything before touching sandpaper. That one shortcut, thinking a damp cloth was enough, cost me six re-done drawer fronts and half a weekend that I’m still sour about.
Second, I would buy a sprayer rather than rent if I had any other painting projects lined up. The rental was $65 for the weekend, and the Wagner model worked fine, but owning one would let me paint in stages without the clock running. That said, renting was the right call for a one-off project.
Third, I would invest in a drilling template for the new hardware. Two slightly crooked pulls are not a disaster; my wife is the only one who has noticed, but it is the kind of mistake a $15 tool prevents entirely.
The shellac primer was the right call. The urethane paint was the right call. Spraying the doors and brushing the frames was the right call. Prep being the dominant time sink was the truth I did not want to believe until I lived it.
If you have painted your kitchen cabinets and found a trick I missed, especially for degreasing or masking, I would like to hear what worked in your kitchen.
Key Takeaways
- Degreasing is the most important step; if you don't do it right, the paint will fall off in months.
- Rent a sprayer, and I cannot stress this enough: the result is better than a brush and with significantly less effort.
- Let one coat dry before putting on another, or you will also have bubbling paint and a headache.
- Total cost was about $280 in materials versus an $8,000 refacing quote and $15,000 for new cabinets.
Frequently Asked Questions
How long does it take to paint kitchen cabinets?
Do you need to sand kitchen cabinets before painting?
What is the best paint for kitchen cabinets?
Do I need to use primer before painting wood cabinets?
Should I use a brush, roller, or paint sprayer for cabinets?

Malik Areeb Ahmed is a contributor at Aesthetic Vibes, covering home improvement and DIY projects.